Menu

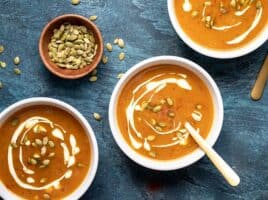
This Pumpkin Curry is thick, velvety, rich, and flavor-packed, with tender fresh pumpkin, warm spices, and creamy coconut milk. I love curry year-round, but there’s something special about those crisp autumn months that really makes me crave it, and this one does the trick! It’s a completely vegan meal that comes together in less than an hour, and at $2.74 per serving, it feels restaurant-worthy without the restaurant price. Serve it over a fluffy bed of rice (which is included in this recipe cost!), and you’ve got comfort in a bowl. I love this pumpkin curry so much, and honestly, I have a feeling I’ll be making it all season long!

Overhead view of a bowl of pumpkin curry with white rice.

Two Kinds of Pumpkin, One Cozy Curry

If you’ve never cooked with fresh pumpkin, don’t worry, I’ve got your back! Grab a pie pumpkin and follow my step-by-step photos, taking your time and using your handy dandy chef’s knife. Breaking down the pumpkin is the most hands-on part of this recipe, but once it’s diced, the rest comes together pretty quickly. Can’t find a pie pumpkin? Don’t fret. Butternut squash can step in here (or try our butternut squash curry, which is another cozy option!)

Once the pumpkin is diced, I build serious flavor with simple ingredients like fresh garlic, ginger, tomato paste, and warm spices. I also use both fresh pumpkin and pumpkin purée in this recipe for a reason. The fresh pumpkin stays tender but still gives you a little bit of bite, and the purée helps create that rich, thick sauce I want in this curry. Sauté the pumpkin and onions until they start to soften, then add fresh garlic and ginger to build a fragrant base. Tomato paste helps deepen the flavor, and the warm spices and creamy coconut milk bring everything together. Then I finish it with a little brown sugar to balance the spices and add subtle, warm molasses notes. Give it one more taste, adjust the seasoning, and don’t be scared to add an extra splash of broth if needed. Personally, I like my curry thick and velvety. 😋

Recipe Success Tips

  1. Not sure what a pie pumpkin is? They’re also known as sugar pumpkins or cooking pumpkins. They’re smaller than carving pumpkins, usually about 6-8 inches in diameter, and are sold mostly in the fall. Pie pumpkins are grown for cooking and baking and tend to have sweeter, denser, more flavorful flesh with less stringy pulp than carving pumpkins. (Avoid carving pumpkins for this reason!)
  2. Aim for roughly ½-inch pieces when dicing the pumpkin. They don’t need to be perfectly identical, but keeping most of the pieces around the same size helps them become tender at roughly the same time. This way, you won’t end up with some pieces still firm while others get too soft. See my prep photos below for a visual reference on how small I dice my pumpkin!
  3. Make sure the oil in the pan is nice and hot before adding the pumpkin. This will help it brown on some sides and not stick to the pan. Also, letting it sit undisturbed for the first 5 minutes or so will help it sear.
  4. Don’t cook the pumpkin until it’s falling apart! You want it tender enough to easily pierce with a fork, but the cubes should still hold their shape and have a little bite. Remember, the pumpkin keeps cooking once you add the coconut milk and pumpkin purée, so letting it get too soft early on can leave you with mushy pieces by the end.
  5. Adjust the consistency to your liking. I like my curry on the thicker side, so I only add ¼ cup of vegetable broth at the end to loosen the sauce. If you prefer a thinner curry, stir in a little more broth until it reaches the consistency you like.
  6. Bulk it up with some protein or extra veggies. This pumpkin curry is already plenty hearty, but it’s also easy to add to. Add canned chickpeas (drained & rinsed) or cooked shredded chicken (if you’re not keeping the recipe vegan) at the end for some extra protein, or add veggies like bell peppers, carrots, spinach, or other greens. Firmer vegetables can cook with the pumpkin, but I’d stir in leafy greens near the end so they don’t overcook.
A woman cooking a pumpkin curry on a stovetop in a kitchen.
Melissa Nolan making her pumpkin curry in our Nashville test kitchen.

The Pie Pumpkin Breakdown

Instead of trying to peel a whole pumpkin, I cut it into wedges first. It’s much easier to handle, and it makes getting those even ½-inch cubes a lot simpler. All you need is a sturdy cutting board, a spoon, and a sharp chef’s knife to get your pie pumpkin curry-ready!

  1. Halve and scoop: Carefully cut the pie pumpkin in half from top to bottom, starting just beside the stem. Scoop out the seeds and stringy pulp with a spoon. Save those seeds for roasting if you’d like!
  2. Trim and slice: Cut away the stem and the small piece at the bottom of each half. Place the pumpkin cut-side down on your cutting board so it sits nice and steady, then slice each half into roughly ½-inch-wide wedges.
  3. Peel the pumpkin: For this pumpkin curry, I remove the skin before cooking. Working with one wedge at a time makes this much easier than trying to peel the whole pumpkin at once. Use your chef’s knife to carefully slice the skin away from each wedge.
  4. Dice it small: Cut the peeled wedges into roughly ½-inch cubes, like the ones shown in the photo here. They don’t need to be perfectly identical, but keeping them close in size helps them cook at the same rate in the curry.
The step by step process of diced a pumpkin.
Slice the pumpkin in half, scoop the seeds, cut into wedges, then peel and dice.
Overhead view of a bowl of pumpkin curry with white rice and a lime wedge.
Print Add to Collection

Pumpkin Curry

This easy Pumpkin Curry recipe is a creamy vegan dinner made with fresh pumpkin, canned pumpkin, coconut milk, and warm spices. Cozy and budget-friendly!
Course Main Course
Cuisine Indian
Total Cost $10.96 recipe / $2.74 serving
Prep Time 25 minutes
Cook Time 25 minutes
Total Time 50 minutes
Servings 4 servings (1.5 cups curry and ¾ cup rice each)
Calories 489kcal

Equipment

  • Medium Pot with Lid
  • Dutch Oven or Large Pot

Ingredients

  • 1 pie pumpkin seeds removed, skin removed & small dice, (about 2 lbs., 4 cups) $2.62*
  • 1 Tbsp vegetable oil $0.04
  • 1 small onion small dice, (2 cups) $0.80
  • 1 cup long grain white rice uncooked, $0.38
  • 2 cups water $0.00
  • 1 Tbsp fresh ginger minced, (about 1-inch piece) $0.16
  • 4 garlic cloves minced, (2 Tbsp) $0.24
  • 2 Tbsp tomato paste $0.14
  • 1 Tbsp garam masala $1.20
  • 1 tsp curry powder $0.17**
  • 1 tsp ground cumin $0.09
  • 1¼ tsp salt $0.05
  • ½ tsp black pepper freshly cracked, $0.08
  • 13.66 oz. can full-fat unsweetened coconut milk $2.99
  • 15 oz. can 100% pumpkin puree not pumpkin pie filling, $1.96***
  • 1 tsp brown sugar $0.01
  • ¼ cup vegetable broth $0.03****

Instructions

  • Gather and prepare all ingredients. Using a chef’s knife, carefully cut the pie pumpkin in half from top to bottom, starting right beside the stem. Use a spoon to scoop out the seeds and stringy pulp. (Save the seeds for roasting, if you'd like!)
  • Cut away the stem and the small piece of the bottom. Place the pumpkin halves cut-side down, then cut each half into ½"-wide wedges. Then, using your knife, remove the skin from each wedge and dice into small cubes. Continue until all of the pumpkin is diced.
  • Heat the vegetable oil in a large skillet or Dutch oven over medium heat. Once hot, add the cubed pumpkin and onions in an even layer. Cook for about 10 minutes, stirring occasionally.
  • While the pumpkin and onions are cooking, you can start the rice. Add the rice and water to a medium pot and cook it according to the package instructions. Set aside when finished.
  • After the pumpkin and onions have cooked for about 10 minutes, add the garlic and ginger and sauté for 1-2 minutes until aromatic.
  • Next, add the tomato paste and continue cooking for another 1-2 minutes.
  • Sprinkle in the garam masala, curry powder, cumin, salt, and pepper, and stir to combine.
  • Pour in the coconut milk and pumpkin puree. Stir to combine. Bring the curry to a simmer and cook for about 10 minutes, stirring occasionally.
  • Then, stir in the brown sugar until dissolved.
  • Lastly, pour in the vegetable broth and stir to combine. Taste and adjust for seasoning and texture. Feel free to add an additional splash of broth.
  • Serve the pumpkin curry over the rice with desired toppings, then enjoy!

See how we calculate recipe costs here.

Notes

*Pie pumpkins are also known as sugar pumpkins or cooking pumpkins. They are smaller (6-8 inches in diameter) pumpkins sold from about September to November. If you can’t find pie pumpkins, you can absolutely use butternut squash instead. Avoid carving pumpkins, as they have more watery, stringy flesh and a less concentrated flavor.
**Curry powder is a blend of spices rather than one single spice. Most curry powders include spices like turmeric, coriander, cumin, and fenugreek, but the exact blend varies by brand. You can use a mild, medium or hot curry powder.
***Make sure to use 100% pure pumpkin, not pumpkin pie mix. Pumpkin pie mix contains added sugar and spices. 
****I like to use Better Than Bouillon to make broths to keep costs low.
Spice level: Using a medium or hot curry powder will make this curry noticeably spicier, and the exact heat can also vary slightly between garam masala blends. Use a mild curry powder if you’re sensitive to spice!
Seasoning options: I use a blend of spices including garam masala, curry powder, cumin, salt, and pepper. You can also use turmeric, coriander, chili powder, or even cayenne if you like it spicy. Or feel free to lean into the pumpkin vibes by adding cinnamon, nutmeg, or allspice.
Want to make this recipe year-round or can’t find a pie pumpkin? You can substitute butternut squash! I tested this recipe with both and found that a 1.5-pound butternut squash yields about the same amount of usable flesh as a 2-pound pie pumpkin. Since butternut squash has fewer seeds and less of the stringy pulp to discard, you get more usable squash compared to the pumpkin.

Nutrition

Serving: 1serving (1.5 cups curry and ¾ cup rice each) | Calories: 489kcal | Carbohydrates: 63g | Protein: 9g | Fat: 25g | Sodium: 880mg | Fiber: 5g

how to make Pumpkin Curry Step-by-Step Photos

The ingredients to make a pumpkin curry with ingredient labels.

Gather and prepare all ingredients. Cut 1 pie pumpkin in half from top to bottom, cutting alongside the stem. Scoop out the seeds and stringy pulp with a spoon, then trim away the stem and bottom ends. Set the halves cut-side down and slice into roughly ½-inch-wide wedges. Now carefully cut away the skin and dice the flesh into roughly ½-inch cubes (as shown in the pumpkin prep photo above).

Onion and diced pumpkin in a pot before being sauteed.

Sauté the pumpkin and onion: Heat 1 Tbsp vegetable oil in a large skillet or Dutch oven over medium heat. Once the oil is hot and shimmering, add the 4 cups diced pumpkin and 1 small diced onion (about 2 cups) in an even layer. Cook undisturbed for about 5 minutes so the pumpkin can pick up some color, then stir occasionally and continue cooking for about 10 minutes total. The onion should be softened, and the pumpkin should be starting to soften with some lightly browned edges.

Cooked rice in a sauce pan.

Cook the rice: While the pumpkin and onion cook, add 1 cup long-grain white rice and 2 cups water to a medium pot. Cook according to the package directions (or follow our step guide on cooking white rice!), then remove from the heat and set aside until serving.

Garlic and ginger added to diced pumpkin in a pot.

Add the garlic and ginger: Stir in 4 minced garlic cloves (about 2 Tbsp) and 1 Tbsp minced fresh ginger into the pumpkin and onion. Cook for 1-2 minutes, stirring often, until the garlic and ginger smell fragrant. Keep an eye on the garlic so it doesn’t brown or burn.

Tomato paste added to a pot with diced pumpkin.

Cook the tomato paste: Add 2 Tbsp tomato paste and stir it through the vegetables. Cook for another 1-2 minutes, stirring frequently, until the paste coats the pumpkin and onion and deepens slightly in color.

Spiced added to diced pumpkin in a pot.

Add the spices: Now sprinkle in 1 Tbsp garam masala, 1 tsp curry powder, 1 tsp ground cumin, 1¼ tsp salt, and ½ tsp freshly cracked black pepper. Stir until the pumpkin and onion are evenly coated and the spices are well distributed.

A can of coconut milk being poured into a pot with diced pumpkin and pumpkin puree.

Build the curry sauce: Pour in 1 can (13.66 oz.) full-fat unsweetened coconut milk and 1 can (15 oz.) 100% pumpkin purée. Stir until the pumpkin purée is fully incorporated and the sauce looks smooth and evenly combined. Bring everything to a gentle simmer, then cook for about 10 minutes, stirring occasionally. The sauce should thicken, and the pumpkin should be tender enough to pierce easily with a fork, but the cubes should still hold their shape rather than falling apart.

Brown sugar added to a pot of pumpkin curry.

Balance the flavor: Stir in 1 tsp brown sugar until completely dissolved. Taste the pumpkin curry and adjust the seasoning if needed.

Vegetable broth added to a pot of pumpkin curry.

Adjust the consistency: Finally, stir in ¼ cup vegetable broth. The finished curry should be rich and spoonable, not watery! If you prefer a looser curry, add another small splash of broth until it reaches your preferred consistency.

A pot of finished pumpkin curry and cooked rice.

Serve over rice: Divide the cooked rice between bowls and spoon the pumpkin curry over the top. Add your desired toppings and serve warm. Enjoy!

Side view of a bowl of pumpkin curry with white rice.

How to Serve Pumpkin Curry

I like to finish my pumpkin curry with fresh cilantro and a squeeze of lime. The cilantro adds a fresh, herby note, while the lime helps brighten up the rich coconut sauce. You can also try parsley or basil, chopped peanuts for a little crunch, or a dollop of sour cream for extra creaminess. And since you already have a fresh pumpkin on hand, save those seeds and make a batch of roasted pumpkin seeds to sprinkle over the top.

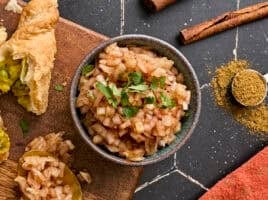
This curry is already a full meal with the rice, but I also like to start with my easy puff pastry samosas and onion chutney. They make such a good appetizer pairing, especially when you’re serving this curry to a group, and you’ll probably have a little chutney left to spoon over the curry, too. A side of naan is another one of my favorites for scooping up all that sauce. I also think this meal would be delish with a side of our Indian-style creamed spinach. It’s also vegan, uses several similar ingredients, and serves four, so the two fit together really nicely!

Storing & Reheating

Store any leftover pumpkin curry separately from the rice so both keep their best texture. Once cooled, transfer each to an airtight container and refrigerate for up to 3-4 days.

Reheating

For the curry, place the leftovers in a saucepan and warm over medium heat, stirring often, until heated through. The curry will thicken as it sits in the refrigerator, so add a splash of vegetable broth or water if needed to loosen the sauce.

For the rice, I’ll transfer it to a microwave-safe bowl and break up any clumps with a spoon. Add 1 tablespoon of water per cup of rice, cover with a damp paper towel, and microwave in 30-second intervals, stirring between each one, until warmed through.

Freezing

I don’t recommend freezing this vegan pumpkin curry. The coconut milk can separate as it thaws, which may leave the sauce grainy or watery. I’d stick with refrigerating any leftovers and enjoying them within a few days.

Other Vegetable Curry Recipes to Try

  • For another veggie-packed option, try our Eggplant Curry, made with roasted eggplant, tomatoes, and warm spices for a thick, smoky curry!
  • If you need dinner on the table fast, our 15-Minute Vegetable Curry uses frozen vegetables and a simple coconut curry sauce for an easy weeknight meal.
  • I also like our Chickpea Curry when I want something hearty and filling, with chickpeas and kale simmered in a creamy curry sauce.
  • For even more plant-based protein, try our Tofu, Spinach, and Green Pea Curry, with tender tofu, plenty of veggies, and warm curry spices.

The post Pumpkin Curry appeared first on Budget Bytes.


from Budget Bytes https://ift.tt/yZQSslF
0

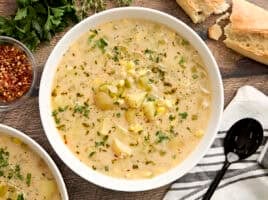
Zuppa Toscana is probably one of the richest, most hearty soups out there and is definitely one of my favorites. This creamy soup with tender potatoes and flavorful Italian sausage is modeled after the famous Zuppa Toscana from The Olive Garden restaurant, but I threw in my own personal twist. I’ve added an extra budget-friendly ingredient and lightened it up just a touch so I can slurp up a giant bowl without feeling too full.

Overhead close up view of a bowl of zuppa toscana with a spoon.

“I love this recipe. We make it so often, it is literally taped to the cabinet next to the stove! Works perfect every time. I occasionally swap cannellini beans for the great northern if I cannot find them. Other than that, it’s so perfect!”

Pam

Easy Recipe for Zuppa Toscana

If you’ve never been to Olive Garden or had Zuppa Toscana soup anywhere else, I’d describe it as a creamy potato soup loaded with flavorful Italian sausage, kale, and bacon. The original version uses heavy cream, bacon, and a whole pound of sausage, but I decided to try to lighten it up a bit. I used half-and-half instead of heavy cream, subbed half the sausage for white beans, used smoked paprika for smokiness instead of bacon, and then loaded up on potatoes and kale. The result? Still totally creamy and chock full of flavor, plus a hefty dose of vegetables. Whenever I make this soup, I know I’m going to eat nothing but this for the next four days straight (it has kale, so it’s okay, right?).

And the savings are pretty great, too. The last time I checked, one bowl of Zuppa Toscana at my local Olive Garden would set you back $8.79, whereas this entire batch costs about $9.10 for EIGHT servings (that’s a savings of about $7.65 per serving!) That’s a true budget win, I’d say, and this isn’t the only Olive Garden copycat we’ve recreated for less! Our pasta e fagioli is another restaurant favorite, but instead of a creamy potato broth, it’s a hearty tomato-based soup with beans, vegetables, and pasta.

Tips for adding dairy to hot soups!

Anytime you add dairy to a homemade soup like this one, there’s a chance it can separate or curdle. To avoid this, I’ve always simmered my soups (and never let it come to a boil!), but I want everyone to enjoy their Zuppa Toscana as intended, so I’ve updated the recipe to include the following information:

  1. Use room temperature half and half, as cold dairy is more likely to curdle than room temperature dairy.
  2. Temper the half and half with some of the hot broth before adding it to the soup.

These tips (room temperature half and half, tempering the dairy before adding to the pot, and only letting the soup simmer once it’s added) will go a long way in keeping your soup silky-smooth and creamy—not curdled or grainy.

make it vegetarian

The sausage in this copycat Zuppa Toscana recipe is responsible for adding a lot of flavor to this soup, so if you plan to skip the sausage to make this recipe vegetarian, you’ll need to ramp up the seasoning. I suggest adding a tablespoon or so of Italian seasoning blend to make up for the spices that are found in the Italian sausage. You may also want to add an extra can of beans to bulk up the soup a bit. Be sure to use a vegetarian broth, too!

How to Serve Zuppa Toscana

Zuppa Toscana is truly a meal in a bowl with starchy potatoes, Italian sausage, beans, and plenty of kale, so you definitely don’t need a side. This recipe makes 8 servings (about 1½ cups each), which is plenty for a family dinner or for saving a few portions for later. Ladle the soup into bowls while it’s nice and hot, then add a sprinkle of grated Parmesan so it softens and melts right into the creamy broth.

But if I’m serving it for dinner and want it to be EXTRA filling and hearty, some warm garlic bread is probably my first pick for sides. It’s perfect for soaking up the creamy broth and can warm in the oven as the soup finishes on the stove. A loaf of no-knead bread or soda bread also works well if you want something simple to tear and share at the table. Or for a cozy Italian-inspired dinner, I’d add a crisp simple side salad with romaine, tomatoes, pepperoncini, Parmesan, and Italian dressing. It adds something fresh and crunchy next to the creamy soup, and with warm bread and a little extra Parmesan over each bowl, you’ve basically got the full Olive Garden-at-home experience!

Side view of zuppa toscana in a bowl with bread, green salad and parmesan cheese around it.
Shown here with garlic bread, a simple green salad, and shredded Parmesan cheese.

Got Leftovers? Here Are Your Options

This Zuppa Toscana recipe makes 8 hearty servings, so I almost always plan on turning at least part of it into lunch prep. Once the soup has cooled a bit, I portion it into individual 16 oz. containers or jars and keep them in the fridge for easy grab-and-go lunches. Reheating one portion at a time keeps the potatoes and creamy broth in better shape than reheating the whole pot again and again. This soup stores well for up to 3-4 days in the fridge.

Side view of zuppa toscana soup in mason jars with glass lids.
These glass mason jars are my favorite for meal prepping this soup.

If I know I won’t finish it in a few days, I freeze it in portions instead. Silicone molds make that really easy. Once the soup is frozen solid, I transfer the cubes to a zip-top freezer bag so they take up less space and I can pull out only what I need. Frozen Zuppa Toscana will keep well for about 3 months.

Overhead view of zuppa toscana in ice cube molds.
Shown here added to silicone molds for freezing.
Overhead view of frozen cubes of zuppa toscana in a ziplock bag.
Don’t forget to name and date your frozen soup!

To reheat, warm the soup gently on the stovetop or in the microwave, stirring occasionally so the broth heats evenly. Just don’t let it boil, since high heat can make the dairy separate. Or to reheat from frozen, place the frozen soup cubes directly in a saucepan over medium-low heat. Stir and continue heating until the soup is heated through.

If it looks a little thicker after reheating, I just add a splash of broth, water, or half-and-half to loosen it back up!

Overhead close up of homemade zuppa toscana in a bowl with a spoon.
Print Add to Collection

Zuppa Toscana

Zuppa Toscana is a creamy, filling, and flavorful soup with Italian sausage, potatoes, and kale. Just like The Olive Garden's, but made from scratch!
Course Main Course, Soup
Cuisine Italian
Total Cost $9.10 recipe / $1.14 serving
Prep Time 15 minutes
Cook Time 30 minutes
Total Time 45 minutes
Servings 8 servings (1.5 cups each)
Calories 300kcal

Equipment

  • Large Soup Pot or Dutch Oven

Ingredients

  • ½ lb. Italian sausage hot or mild, $1.73*
  • 1 yellow onion $0.86
  • 2 garlic cloves $0.14
  • 15 oz. can Great Northern beans $0.92**
  • ½ tsp smoked paprika $0.07
  • 3 cups chicken broth $0.38***
  • 1 cup water $0.00
  • 1 lb. red potatoes $1.45
  • ½ lb. kale chopped with stems removed, $1.69
  • 2 cups half and half room temperature, $1.78****
  • ¼ tsp salt $0.01
  • 1 pinch red pepper flakes optional, $0.02
  • black pepper freshly cracked, (optional) $0.05

Optional Toppings

  • cooked bacon crumbled or diced, optional – see notes

Instructions

  • Gather all ingredients.
  • Add the sausage to a large soup pot and sauté over medium heat, breaking it up into small pieces as it cooks. The sausage should contain enough fat to keep it from sticking, if not add a touch of olive oil. It’s okay if a small amount browns on the bottom of the pot.
  • While the sausage is cooking, dice the onion and mince the garlic. Add the onion and garlic to the pot and sauté until the onions are softened. The moisture from the onions should help dissolve any browned bits of sausage off the bottom of the pot.
  • Drain and rinse the can of beans. Add the beans, smoked paprika, chicken broth, and one cup water. Place a lid on the pot and let it come up to a simmer over medium heat.
  • While the pot is heating, cut each potato into quarters lengthwise, then slice across into thin, ⅛" thick slices. Add the potatoes to the pot along with the pre-chopped kale. The kale will fill the pot when it's first added, but the heat from the liquid will wilt it within a few minutes. Stir it occasionally to help the wilting process.
  • Let the pot simmer over medium heat for about 15 minutes, or until the potatoes are tender.
  • Remove some of the hot broth from the pot, transfer it to a separate bowl, and whisk in the room temperature half and half. Now, pour the tempered half and half mixture back into the soup pot with the potatoes and kale. Bring everything to a gentle simmer (don't let it boil!).
  • Season with salt, red pepper flakes, and freshly cracked black pepper if desired.

See how we calculate recipe costs here.

Video

Notes

*You can use hot, mild, or sweet Italian sausage for this soup. Buy loose-ground Italian sausage rather than sausage in casings. 
**You can use any type of white bean you want, such as cannellini or navy beans. If you don’t like beans, you can leave them out and add more sausage or potatoes.
***I use Better Than Bouillon brand soup base to make my broth.
****If you’re not from the U.S., “half and half” is like a lighter version of light cream. Be sure to use room temperature half and half. If you don’t have half and half, you can substitute with an equal mix of room temperature whole milk and heavy cream (use double cream if you’re in the UK).
Optional bacon: The classic Zuppa Toscana usually includes bacon, but to keep prices down and make this soup even easier, I use smoked paprika to add that smoky flavor without the extra cost. If you still want bacon, I’d crumble a little over individual bowls just before serving so you get the flavor without changing the recipe steps. Optional bacon is not included in the recipe cost.
Dairy-free: Some of our readers have replaced the half-and-half with full-fat coconut milk, creamy unsweetened oat milk, or plant-based heavy cream with good results! Coconut milk may add a slight coconut flavor. Whichever substitute you choose, bring it to room temperature and temper it with the hot broth before adding it to the soup. For a thicker soup, blend ½ cup of the beans with some of the broth and stir it back into the soup before adding the dairy-free milk.
Naturally gluten-free: This Zuppa Toscana is naturally gluten-free as written. If you’re cooking for someone who needs to strictly avoid gluten, double-check the labels on your Italian sausage and broth to make sure they’re certified gluten-free.

Nutrition

Serving: 1.5cups | Calories: 300kcal | Carbohydrates: 26g | Protein: 13g | Fat: 17g | Sodium: 674mg | Fiber: 5g

How to Make Zuppa Toscana Step-by-Step Photos

The ingredients to make zuppa toscana with labels.

Gather your ingredients and set the half-and-half out to come closer to room temperature. Starting with room-temperature dairy and tempering it later helps it blend smoothly into the hot soup without curdling.

Ground sausage in a pot.

Brown the sausage: Add ½ lb. Italian sausage to a large soup pot and cook over medium heat, breaking it into small pieces as it browns. I didn’t use any extra oil because sausage tends to be pretty fatty. It’s okay if a little sticks to the bottom of the pot because it’ll dissolve in the next steps. A few browned bits on the bottom are a good thing. They’ll add extra flavor to the soup.

Diced onion on a wooden cutting board with minced garlic.

While the sausage browns, dice 1 yellow onion and mince 2 cloves of garlic.

Onion and garlic added to browned sausage in a pot.

Sauté the aromatics: Add the onion and garlic to the pot and continue cooking until the onion is soft and translucent. As the onion releases moisture, stir and scrape up those browned sausage bits from the bottom of the pot.

Broth being poured into a pot of beans and seasoning.

Build the broth: Drain and rinse one 15 oz. can of Great Northern beans. Add the beans, ½ tsp smoked paprika, 3 cups chicken broth, and 1 cup water to the pot. Stir well, cover the pot, and bring the broth to a simmer over medium heat. The smoked paprika will give that smoky hint that the bacon would have supplied. Sneaky, right?

Sliced potatoes on a wooden cutting board.

Prep the potatoes: While the pot is heating up, wash 1 lb. red potatoes and slice them about ⅛-inch thick. Keeping the slices thin and fairly even helps them cook quickly and at the same rate.

Kale and potatoes added to a pot of soup.

Add the vegetables: Add the sliced potatoes and ½ lb. chopped kale to the pot. The kale will look like a lot at first, but it wilts down quickly. Give it a stir occasionally to help it come into contact with the hot soup and wilt. After a few minutes, it’ll have wilted down into the soup nicely. Let the soup simmer over medium heat for about 15 minutes or until the potatoes are tender.

Broth being added to half and half to temper the dairy.

Temper the half-and-half: Now, remove some of the hot broth and stir it into 2 cups room-temperature half-and-half. Gradually warming the dairy before it goes into the pot helps prevent it from separating.

Half and half being poured into a pot of homemade zuppa toscana.

Simmer: Pour the tempered half and half into the pot and bring it up to a gentle simmer. DO NOT let it come to a boil at any point now!

Black pepper and crushed red pepper added to a pot of zuppa toscana.

Season to taste: I like my soup spicy (and had used mild Italian sausage), so I seasoned it with a pinch of red pepper flakes. A little freshly cracked black pepper is also nice. Depending on what type of broth you use, you may need to add a little salt (about ¼ tsp).

Overhead view of a finished pot of zuppa toscana.

Serve, and enjoy!

Overhead close up of homemade zuppa toscana in a bowl with a spoon.

Absolutely deserving of all the internet hype. SO. GOOD.

Other Easy Italian Inspired Soups to Make

  • Italian Wedding Soup combines tender homemade meatballs, vegetables, greens, and pasta in a light, savory broth for another hearty bowl that still feels fresh.
  • For a meatless option, my easy Minestrone Soup is loaded with vegetables, beans, and pasta, and it’s easy to adjust depending on what you already have on hand!
  • Our Lasagna Soup takes things in a richer, cheesier direction with all the familiar flavors of lasagna in an easy, cozy soup.

Our Zuppa Toscana recipe was originally published 1/31/15. It was retested, reworked, and republished to be better than ever 9/30/26.

The post Zuppa Toscana appeared first on Budget Bytes.


from Budget Bytes https://ift.tt/lDYVevO
0

Author

authorHello, my name is SURESH KUMAR. I'm a 50 year old self-employed Pirate from the Caribbean.
Learn More →